Ever walked outside in early spring, peeled off your lap pool cover, and found a green, murky mess instead of sparkling blue water? That pit-in-your-stomach moment hits hard if you haven’t winterized properly — and every seasoned pool owner’s been there at least once.
Skipping even a single step when closing your lap pool can leave you battling cracked tiles, burst pipes, and shocking repair bills. The truth is, winter doesn’t go easy on neglected pools. Melting snow, freezing nights, and just a little bit of leftover water in the pipes — it all adds up fast.
By the time you finish this guide, you’ll know exactly how to master each winterizing lap pool guide steps process, turning a stressful seasonal task into a quick win for your peace of mind. Ready to safeguard your swim? You won’t want to miss what comes first.
When To Start Winterizing Your Lap Pool
Trying to guess the right time to winterize your lap pool? Timing really matters more than most folks realize. Waiting too long can leave your pool at risk for freeze damage and green water, while closing it too soon could waste valuable swim days and make maintenance harder in the spring.
Most pool pros recommend starting your winterization process when daytime highs consistently drop below 65°F and leaves begin to fall in earnest. That’s because organic debris—fallen leaves, pollen, bugs—can quickly overload your filter just before freezing temps hit. According to the Association of Pool & Spa Professionals, prepping before the first frost keeps your water balanced and protects plumbing from ice expansion.
💡 Pro Tip: Monitor your local extended weather forecast. If night temperatures dip into the low 40s for several days straight, it’s a signal to move fast with closing steps.
- Water temperature is key: If your pool drops below 60°F, algae growth slows down, making it easier to maintain water clarity through winter downtime.
- Don’t be fooled by a late-warm September—rapid weather shifts can sneak up fast.
- Closing too early, though, can mean higher chemical consumption and wasted pool time.
Picture this scenario: Jamie had always shut her lap pool right after Labor Day, thinking she was ahead of the game. One unusually warm October, she spent weeks battling cloudy water and refilling chemicals because the pool wasn’t quite ready to rest. Her neighbor waited until the last second in November—only to find the waterline frozen solid overnight, cracking a pipe. It’s all about striking the right balance.
| Sign | Recommended Action | Risk If Delayed |
|---|---|---|
| Daytime highs below 65°F | Start prepping supplies and testing water | More debris, harder cleanup |
| Night temps below 40°F | Drain, balance, winterize lines | Freeze damage |
| Leaves falling steadily | Net debris, install cover as soon as water is prepped | Stained liner, excess algae |
The truth is, you can’t rely on the calendar alone; local climate shifts every year. What actually works might surprise you…
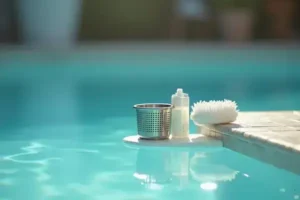
Essential Supplies And Preparation Checklist
What’s worse than spending your weekend winterizing only to realize you forgot a key tool halfway in? The power of preparation can’t be overstated — having the right supplies on hand will save you time, money, and a ton of mid-task frustration as temperatures drop.
- Heavy-duty pool cover: Keeps debris, sunlight, and algae out all season.
- Water-tight plugs: Also known as winterizing plugs, these seal return lines and skimmer pipes to prevent freeze damage.
- Chemical winterizing kit: A balanced set of algaecide, stain inhibitor, and winter shock simplifies treatment (and keeps spring opening painless).
- Skimmer gizmo: Specially designed to absorb ice expansion pressure — tiny tool, huge protection.
- Submersible pump or siphon: For lowering the water level below skimmers, if required by your system.
- Pool brush and net: Pre-closing cleaning is a must. Don’t skip it!
💡 Pro Tip: Bag and label every plug, basket, and small part as you remove them. According to the National Swimming Pool Foundation, missing or incorrect reinstallation is one of the top causes of spring leaks during pool startups.
In practice: Mike thought he’d improvise with just a tarp, basic household bleach, and some leftover test strips. Come spring, his liner was stained and his pipes were cracked — a preventable $900 hit because he skipped specialized pool antifreeze and real winter plugs. Learning the hard way stings way more than buying the right gear up front.
| Item | Purpose | Prep Tip |
|---|---|---|
| Winter Pool Cover | Blocks debris and UV | Inspect for holes before use |
| Winterizing Plugs | Seal pipe openings | Use correct size for each fitting |
| Algaecide/Winter Kit | Prevents stains and algae | Double-check dosage for pool size |
The truth is, your supply run shapes your winterizing success from the start. But there’s one detail most owners completely overlook until it’s too late…
Step-By-Step Instructions For Closing Your Pool
Wondering what really separates a pristine lap pool at spring reopening from a green, algae-matted headache? Precise, thorough winterizing — step by step, with zero shortcuts. Here’s your road map for a secure seasonal close that keeps freezing, staining, and equipment repairs at bay.
- Brush and vacuum the pool. Remove all leaves, dirt, and algae from every surface. Debris left behind can rot and stain over winter.
- Balance your water chemistry. Adjust pH (7.2–7.6), alkalinity (80–120 ppm), and calcium hardness to guideline levels. Well-balanced water prevents scale buildup and liner damage.
- Shock and treat with winter chemicals. Use a premium winterizing kit with algaecide and stain inhibitor. Run your pump to circulate for at least 24 hours.
- Lower the water level. Drop the water below skimmer and return line openings, unless your manufacturer advises otherwise. This protects against freezing expansion in the pipes.
- Drain or blow out plumbing lines. Use a shop vac or air compressor to ensure all water is cleared from lines, heater, and pump. Immediately plug every line with the right winterizing plugs.
- Install skimmer gizmo and pool cover. Place the skimmer gizmo for freeze protection, and stretch your winter cover tightly over the pool to keep it sealed and secure all season.
- Store accessories and clean up. Remove ladders, rails, and pool toys. Clean, dry, and stow everything securely to prevent winter rust or damage.
- Allow 2–4 hours for full closure if you have all supplies ready.
- Double-check pool manufacturer’s instructions for any unique steps or products.
- Have a helper on hand for heavy cover installation, especially with large lap pools.
⚠️ Important Warning: Never use automotive antifreeze in pool plumbing—only use pool-safe antifreeze designed for potable water, as recommended by the Pool & Hot Tub Alliance. If unsure, consult a certified pool professional to safeguard your investment.
Picture this scenario: Kelly followed every direction except for blowing out her return lines, thinking the cover would protect them. That January, frozen water caused a hairline crack in the return fitting—insurance didn’t cover the repair. That one missed step cost her over $750 and weeks of lost swim time.
The truth is, the right closing order really can save your pool’s equipment and liner for years. But there’s one detail most owners completely overlook until it’s too late…
Comparing Pool Covers: Which One Protects Best?
How do you know your lap pool will actually be protected when snow piles up or heavy autumn winds start pushing debris across your yard? The truth is, not all pool covers are made equal—choosing the right one can mean the difference between a trouble-free spring and expensive surprises lurking below.
| Cover Type | Strengths | Drawbacks |
|---|---|---|
| Solid Vinyl Safety Cover | Blocks all debris, sunlight, and rain; best for algae control; high weight capacity | Heaviest to install; may require a submersible pump for water removal |
| Mesh Safety Cover | Easy to handle; lets water drain through while keeping out leaves and debris; lighter weight | Allows fine dust and some sunlight in; may promote algae if water warms up early |
| Standard Tarp Cover | Budget-friendly; simple to set up for one season | Tears more easily; requires frequent adjustment and careful anchoring; little safety protection |
In practice: Picture this scenario—last winter, Sam used a budget tarp and found his lap pool filled with brown, slimy sludge and a torn liner come April. His neighbor, however, invested in a sturdy mesh safety cover; she enjoyed a quick, painless reopening—no extra shocks or days of cleaning needed.
💡 Pro Tip: If your lap pool is surrounded by trees or you’re in an area with harsh winter storms, the durability of a solid or mesh safety cover pays for itself by preventing liner staining and avoiding surprise repairs. The Pool & Hot Tub Alliance and multiple pool service pros confirm that ASTM-certified safety covers are well worth the investment for both protection and peace of mind.
- Solid vinyl covers excel at blocking sunlight—crucial for algae prevention.
- Mesh covers are generally easier for one person to handle and store.
- Tarp covers can bridge the gap if you’re on a strict budget, but always anchor them securely and check for rips.
But there’s one detail most owners completely overlook until it’s too late…
Long-Term Maintenance Tips For Winter-Closed Pools
When your lap pool is properly closed for the season, you might assume you can simply ignore it until spring. But that’s where even seasoned pool owners stumble — long-term winter maintenance is what separates an easy reopening from a costly one.
Why? Tiny leaks, cover rips, or water chemistry swings can creep up fast, even when your pool is blanketed beneath a premium cover. Proactive monitoring keeps your investment protected and your first swim of the season stress-free.
- Inspect the cover every few weeks: Remove leaves, ice, and pooled water. A weighted mesh leaf net speeds things up. Never let debris build up for more than a month.
- Check water level monthly: If you notice rapid drops, investigate for possible liner or plumbing leaks beneath the ice. Tiny leaks are easier (and cheaper) to patch now than in April.
- Monitor and adjust the pool’s perimeter: After heavy snow or wind, walk the deck and tighten straps, replace anchor pins, or reposition water bags as needed.
- Pest patrol: Look for animal tracks around the pool. Use deterrents if raccoons or rodents are poking at your cover to avoid midwinter surprises.
💡 Pro Tip: According to the National Swimming Pool Foundation, even closed pools benefit from enzyme-based water treatment every 1–2 months. These products break down lingering organic matter — helping avoid waterline staining and sticky spring cleanup.
In practice: After a wicked storm, Jackson skipped a post-blizzard check, thinking the cover “looked fine from the house.” Two weeks later, a sharp sheet of ice had pulled a grommet loose — letting water drip in and turning his pool an expensive brown by March.
| Task | Frequency | Prevented Problem |
|---|---|---|
| Cover Inspection | Every 2–4 weeks | Rip, debris, excessive weight |
| Water Level Check | Monthly | Leaks, freeze damage |
| Enzyme Treatment | Every 1–2 months | Staining, biofilm buildup |
Once this is in place, the rest of the routine falls into place naturally.
Your Pool’s Winter Is Handled
If you take just one thing from this winterizing lap pool guide steps, let it be: preparation and timing save you big headaches (and bills) down the road. Get your supplies ready, shut down step by step, and choose the cover that fits your climate best. Those three tips are what keep your pool safe all winter long.
Before, winter meant guessing—maybe even dreading what you’d find in spring. Now, you’ve got the real-world checklist, detailed steps, and pro tricks to handle it like a seasoned owner. It’s all about smart prep, clear action, and a little regular attention. You’ll open to blue water and peace of mind.
Which pool closing tip felt like your personal game-changer this year? Tell us in the comments—your story could help another swimmer avoid a costly mistake.

Marcus Lee Whitmore is a lap pool enthusiast and aquatic fitness writer dedicated to helping homeowners plan, install, maintain, and train in their home lap pools. With years of hands-on experience managing his own lap pool and endless pool system, Marcus built Ldesw to be the honest, practical resource every lap pool owner deserves from day one.