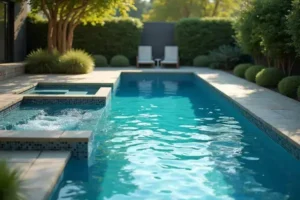
Picture this: you walk into your sunny backyard, towel draped over your shoulder—there’s your own lap pool waiting. No crowded lanes, no memberships, just you, the water, and an endless stretch to swim whenever you want.
But here’s the thing: getting from “daydream” to “dove in” isn’t just about digging a hole and filling it up. Miss a key detail—or choose the wrong setup—and you could find yourself pouring money or energy into a pool that doesn’t fit your real life or needs.
By the end of this guide, you’ll know how to pick, plan, and install the perfect lap pool for your space—even if you’re a total newbie. Every step focuses on lap pool guide beginners at home essentials so you can avoid costly surprises and actually enjoy every lap. Ready to see what’s possible?
Key Considerations Before Deciding On A Lap Pool
Thinking about a lap pool in your backyard? Before you dive into design catalogs or pin inspiration boards, you’ll want to understand the real-world trade-offs. Trust me, there’s a lot more to this decision than just picking a length and calling it a day.
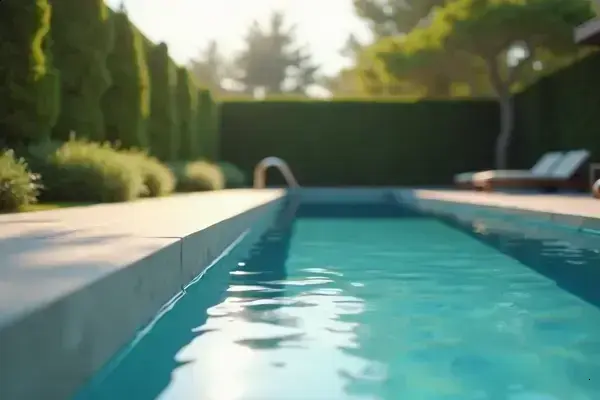
Let’s start with space. You might be surprised how often homeowners underestimate the footprint needed for a functional lap pool. The standard minimum length is about 40 feet, but even a 30-foot model requires careful site planning—especially when you factor in setbacks, patio space, and the way you’ll actually move around the pool.
- Local Zoning & Building Codes: Always check your municipality’s guidelines. The National Swimming Pool Foundation recommends consulting with licensed contractors to avoid costly legal hiccups.
- Site Orientation: Sun exposure, wind direction, and shade from trees affect maintenance and daily usability. South-facing pools warm faster, but also invite more evaporation.
- Accessibility: How easy will it be to enter, exit, and clean the pool? Steps, ladders, and even deck surfacing make a big difference for safety and long-term use.
💡 Pro Tip: Consider the future: a single lap lane might be plenty now, but wish lists (and families) have a way of growing. Plan for expansion—leave extra space if possible.
Picture this scenario: a couple in a standard suburban lot carves out the corner for a pool, only to discover the excavation will cut into an underground utility easement. Suddenly, their design shrinks by six feet—not great for a continuous swim! That’s why pre-work with a surveyor (or your local planning office) prevents late-stage regret.
| Factor | Why It Matters | Typical Oversight |
|---|---|---|
| Setback Distance | Legal distance from fences and structures | Pool ends up smaller than expected |
| Sun & Wind | Affects swim temperature and debris | Cold shady pools, extra cleaning |
| Utility Lines | Safe construction and future repairs | Design revision mid-project |
The truth is, these early details shape the entire experience—get them right, and the rest falls into place. But there’s one detail most owners completely overlook until it’s too late…
How Much Space And Budget Do You Really Need?
How much room does a lap pool really demand—and how deep does your budget need to go? That’s the first hurdle for almost every homeowner, and the answers aren’t always obvious.
Sure, you might’ve heard that “any backyard can fit a pool,” but for lap swimming, usable length matters far more than width. Pools designed for fitness are typically a minimum of 30 feet long, but if you’re serious about laps, 40 feet is often considered ideal.
- Minimum Length: 30–40 feet recommended for comfortable swimming
- Minimum Width: 8–10 feet for a single lane
- Deck Space: At least 3 feet around all sides for safe access
- Depth: 4–5 feet ensures both efficiency and safety
💡 Pro Tip: Mark out the designated area using rope and lawn markers before building—most people are surprised by the real size once it’s outlined. The Association of Pool & Spa Professionals suggests always confirming exact measurements with a licensed contractor.
Picture this scenario: You’ve found the perfect spot at the back of your lot. You draw up plans for a 35-foot pool, only to realize the pattern of tree roots or local setback laws force you to trim the design. Suddenly, the dream lap pool feels more like a plunge tub. That’s why groundwork and a site survey are non-negotiable.
| Pool Size | Typical Budget Range | Best For |
|---|---|---|
| 30’x8′ | $25,000 – $40,000+ | Solo swimmers, tighter lots |
| 40’x10′ | $40,000 – $65,000+ | Regular training, families |
| Custom shapes | $50,000 – $100,000+ | Unique layouts, high-end features |
Ongoing maintenance and heating can cost $1,200–$2,500 per year depending on your region and pool type. It adds up—especially with extras like automatic covers or saltwater systems. Always leave a buffer in your project fund for unexpected site prep or upgrades.
But budget and size aren’t the only decisions on your plate. What actually works might surprise you…
Choosing The Right Design, Materials, And Features
Staring at design catalogs, you’ll realize—lap pools come in more flavors than just “rectangular and blue.” Your choices here shape not just appearance, but durability, comfort, and long-term satisfaction. The big question? How do you balance style, function, and maintenance over years of daily use.
- Shape & Configuration: Rectangular pools are classic and most space-efficient for laps, but kidney and custom shapes add visual interest at the cost of swim efficiency.
- Construction Materials: Choose between concrete (shotcrete or gunite), fiberglass, and vinyl liner. Concrete’s the gold standard for full customization and durability—while fiberglass installs faster and often requires less cleaning.
- Finish & Texture: Tile surfaces offer a luxury touch and easy cleaning, but plaster and pebble finishes provide traction and come in a wide price range.
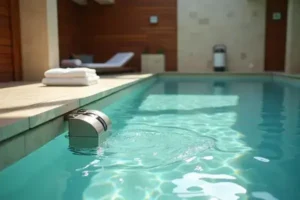
- Integrated Features: Think about lap jet systems, pool covers, in-floor cleaning, LED lighting, and energy-efficient heat pumps for year-round usability.
| Material | Pros | Cons |
|---|---|---|
| Concrete | Custom shape, long lifespan | Higher cost, 3+ months build |
| Fiberglass | Quick install, low maintenance | Limited shapes, crane access needed |
| Vinyl Liner | Budget-friendly, soft underfoot | Liner needs replacement ~10 yrs |
💡 Pro Tip: Don’t just ask about initial material price—ask for the expected “lifetime cost” including repairs, resurfacing, and cleaning. The National Plasterers Council recommends using only licensed contractors with a strong track record in your chosen material.
In practice: picture this scenario—a homeowner selects a dazzling pebble finish only to discover algae buildup is far tougher to scrub than with a tile pool. Or they splurge on sun shelves and underwater lighting, then rarely use either outside of entertaining guests. Spending time in showrooms and physically touching materials can make all the difference.
Design and features may dazzle you—but installation will test your patience and attention to detail. And this is exactly where most people make the most common mistake…
Step-By-Step Installation: From Groundwork To Finishing Touches
What’s the real journey from empty yard to first swim stroke? The lap pool installation process is more complex than most people expect—but completely manageable with the right approach. Time to break it down, step by step.
- Survey tape and measuring tools
- Construction plans, permits, and municipal approvals
- Excavator and safety gear
- Pool shell or materials (concrete, fiberglass, or vinyl liner)
- Pumps, filters, plumbing fittings
- Decking and finishing materials
- Site Prep & Marking: Mark boundaries, check utilities, and get necessary permits. Expect this to take a week, longer if approvals are slow.
- Excavation & Framing: Dig out the pool shape. Protect existing landscaping—there’s more dirt than you’d imagine!
- Plumbing & Infrastructure: Lay out water lines, install drains, and rough in electrical for heaters or pool lighting.
- Structure Installation: Set the pool shell (for fiberglass), pour concrete (for gunite/shotcrete), or build the wall frame for vinyl. This is where shape and precision matter most.
- Finishing Touches: Install tile, coping, deck, and pool hardware. Plaster or liner finishes go in last. Fill, test balance, and start up your filtration system.
⚠️ Important Warning: Always use licensed contractors for excavation and utility work. According to the Pool & Hot Tub Alliance, improper setup can cause leaks, electrical hazards, or legal fines down the road.
In practice: picture this scenario—a family racing to finish their pool before a birthday finds rain delays and an unexpected permit snag. The process takes two extra weeks, but because they built in a flexible timeline, stress didn’t derail the experience. Plan on 6–12 weeks for most builds, adjusting for weather and custom features.
Here’s the thing: small setbacks aren’t unusual, so patience is key. And this is exactly where most people make the most common mistake…
Common Mistakes And Pro Tips For First-Time Owners
What trips up so many first-time lap pool owners? It’s rarely just one big blunder—it’s a dozen small miscalculations that add up over time. If you know what to watch for, you can sidestep the stress and expense.
- Skipping Water Chemistry Basics: Forgetting regular testing or proper balancing leads to algae, eye irritation, or equipment corrosion. The Centers for Disease Control and Prevention stress the importance of weekly pool chemistry checks.
- Neglecting the Filtration Schedule: Running your pool filter too little (or too much) isn’t just inefficient; it shortens the lifespan of your pump and increases your operating costs. A timer system helps—set it and forget it.
- Underestimating Debris Management: Leaves, bugs, and dust aren’t just unsightly, they can clog drains and boost chemical use. Invest in a quality skimmer or automatic cleaner for daily peace of mind.
💡 Pro Tip: Keep a waterproof maintenance log right next to your pool equipment pad—log every test, service date, and filter change. This habit saves headaches at warranty time and helps spot patterns before small issues become expensive fixes.
In practice: a new owner skipped the handoff tutorial from their pool builder, figuring all systems were set-and-forget. Six weeks later, cloudy water forced them into costly emergency cleanings. Don’t wait for trouble—ask questions from the start and read your documentation, even if it’s just fifteen minutes with a mug of coffee one weekend!
| Mistake | Impact | How To Avoid |
|---|---|---|
| Ignoring water chemistry | Algae, equipment damage | Test & balance weekly |
| Not running filtration enough | Cloudy water, higher costs | Use timer, follow specs |
| Skipping winterization | Cracks, leaks, repairs | Follow regional guidelines |
The right habits in place now make everything easier from here.
Your Lap Pool, Your Way
If you take just one thing from this lap pool guide beginners at home, let it be: planning ahead—space, budget, and maintenance—makes all the difference. Choosing the right design, understanding the real costs, and knowing common pitfalls will set you up for years of easy, enjoyable swims.
Before, a home lap pool might’ve felt out of reach or just a source of stress. Now you know how to get it done on your terms. Even if things felt complicated, you’ve got a clear path and the confidence to move forward. You’re closer to daily laps (and fewer headaches) than you think.
What’s your biggest hang-up about starting your pool journey? Ask away in the comments—let’s make your dream backyard a reality together!

Marcus Lee Whitmore is a lap pool enthusiast and aquatic fitness writer dedicated to helping homeowners plan, install, maintain, and train in their home lap pools. With years of hands-on experience managing his own lap pool and endless pool system, Marcus built Ldesw to be the honest, practical resource every lap pool owner deserves from day one.