Picture this: Your backyard transformed, that dream of swimming whenever you want finally ready to happen—except the whole “how does this actually get built?” part looks like a maze. If you feel lost staring at delivery windows, concrete slabs, or mysterious plumbing diagrams, you’re not alone.
The real frustration is thinking you’re one step away from that first swim, only to run into hidden costs, building delays, or unclear installation steps. That nagging worry isn’t just time lost—it’s the stress of missing out, or worse, needing to redo what could’ve been right the first time.
Here’s the thing: by the end of this guide, you’ll know exactly what’s coming at each stage, how to prep and avoid headache, and what to expect from the whole endless pool installation guide process. There’s a lot to gain—and your swim is closer than it feels right now.
Planning Your Endless Pool Location: Space, Access, And Prep
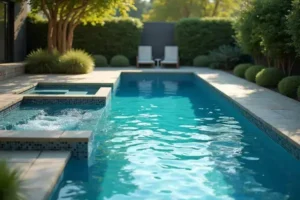
You could have the most advanced Endless Pool on the market—if the location’s off, you’ll hit headaches long before your first swim. What if the ground isn’t level, or access for that big delivery turns out tighter than you thought? These details matter more than you’d think, both for performance and peace of mind.
💡 Pro Tip: According to the Association of Pool & Spa Professionals, choosing a spot with at least two feet of clearance on every side not only simplifies installation but also ensures easier future maintenance and equipment upgrades.
Let’s break it down: your pool’s final home needs to handle the weight of thousands of gallons of water. That means a solid, level base—think reinforced concrete pad for above-ground, or excavated space for in-ground options. Close proximity to power and water lines is a must; running utilities across the yard quickly triples costs if you plan poorly.
- Minimum Size Requirement: Leave room for the pool shell, plus space to move and work around the edges. Endless Pools suggest at least 9’ x 17’ for the smallest fitness model, but bigger is better for comfort.
- Surface: A stable, slope-free zone with drainage—avoid anywhere water puddles after rain.
- Utility Access: Plan for a dedicated 220V electrical line and direct water supply within 15 feet if possible.
- Delivery Route: Check every gate, turn, and overhead line from street to site. Remember, your pool shell or parts can measure up to 8 feet wide—removing a fence panel might save you hours on delivery day.
Site Prep Comparison Table
| Location Type | Setup Complexity | Typical Prep Time |
|---|---|---|
| Concrete Patio (Above-Ground) | Low | 2–4 days |
| Excavated Yard (In-Ground) | Medium–High | 5–10 days |
| Garage/Basement | Medium | 3–6 days |
In practice: imagine a family expecting dip-in-ready by the weekend, only to discover their backyard’s slope requires costly grading, and the utility hookup sits 50 feet away. A quick consult with a licensed pool installer, ideally following guidelines from Endless Pools or the National Swimming Pool Foundation, would’ve saved money and frustration.
And this is exactly where most people make the most common mistake…
What’s Included With Delivery And How To Prepare For Arrival
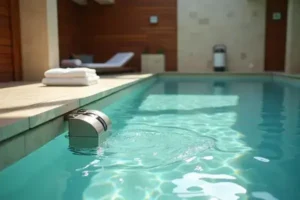
You’ve made the purchase and scheduled delivery, but what exactly will show up on your doorstep? Will there be one massive crate, or boxes of unknown parts? Unpacking an Endless Pool delivery for the first time feels a bit like unboxing a giant puzzle—some pieces heavy, some fragile, all important in their own way.
⚠️ Important Warning: Inspect each item as it’s unloaded and check off the official packing list. According to Endless Pools and the Pool & Hot Tub Alliance, missing hardware or damaged components should be reported before the delivery team leaves. Once they drive away, claims get trickier.
Here’s what usually arrives with a standard Endless Pool delivery:
- Pool shell or wall panels (modular, steel or fiberglass)
- Hydraulic power unit (engine)
- Swim current system
- Filtration and heating equipment
- Liner, coping, and fittings
- Plumbing, hoses, and electrical kits
- Full printed assembly/installation manual
Preparing for Arrival: Step-by-Step
- Clear a drop-off path at least 8 feet wide from street to site.
- Lay down plywood if delivery crosses delicate grass or stone.
- Check that your foundation pad or excavation is fully finished and dry—don’t schedule pools before construction ends.
- Set up clean, weatherproof storage for boxes and panels if you won’t assemble the same day.
- Review the packing list from Endless Pools—you’ll want to spot any shortages immediately.
- Gather recommended tools: socket set, utility knife, rubber mallet, measuring tape.
Picture this scenario: The delivery truck arrives during a spring rainstorm. Without a covered area handy, someone scrambles to tarp the pool panels, risking scratches, water damage, or lost hardware. Planning just one weatherproof corner of your garage or shed can spare you these last-minute headaches.
| Included Item | Purpose | Storage Note |
|---|---|---|
| Wall Panels | Pool structure | Keep out of rain |
| Filtration Kit | Water purity | Store upright, dry |
| Hydraulic Unit | Powers swim current | Keep level, covered |
What actually works might surprise you…
Step-By-Step Pool Installation Process Explained Clearly
Staring down a stack of pool components can feel intimidating—how do you actually turn all those panels and pipes into your own private retreat? The truth is, understanding each phase of installation makes the project manageable and a lot less stressful.
- Pool wall panels (modular or single-shell)
- Heavy-duty liner
- Hydraulic power unit
- Pumps, plumbing, heater
- Assembly hardware (nuts, bolts, fasteners)
- Basic hand tools (socket set, wrench, measuring tape)
💡 Pro Tip: Allocate at least two days for installation—even if you have pros helping. Endless Pools recommends following the manufacturer’s step order closely for best warranty coverage and fewer headaches down the line.
- Site Verification: Double-check that your concrete pad or base is level and free of debris before you begin.
- Assemble Frame & Walls: Set up the pool wall panels or shell per the instruction manual. You may need 2–3 people for this, as panels are heavy and must be squared precisely.
- Liner Installation: Carefully unfold the pool liner and fit it inside the frame, smoothing out all wrinkles. This step prevents future leaks or bunching.
- Install Plumbing & Filtration: Attach pumps, jets, and filters according to your Endless Pool model—each hose must be secured using manufacturer-approved clamps.
- Connect Electrical Components: Licensed electrician required! Connect the hydraulic power unit, swim current engine, and any heating, making sure everything is properly grounded and meets local code.
- Fill & Initial Test: Fill the pool gradually, checking for leaks or uneven settling. Run the current system for a short interval and monitor pressure and flow rates.
Installation Phase Comparison
| Stage | Typical Time | Professional Help? |
|---|---|---|
| Walls & Frame | 6–8 hrs | Strongly recommended |
| Liner & Plumbing | 5–7 hrs | DIY possible |
| Electrical | 2–4 hrs | Licensed electrician |
In practice: picture this scenario — a homeowner teams up with a friend to build their pool, but rushes through leveling the pad. A week later, they notice water pooling in one corner and realize a 1-inch slope. The result? Partial tear-down and a costly redo. That’s why the National Swimming Pool Foundation and most pool installers stress—get the base perfect before anything else goes up.
But there’s one detail most owners completely overlook until it’s too late…
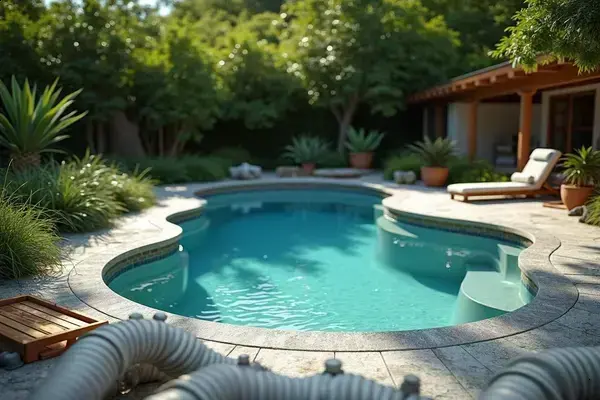
Dealing With Common Installation Challenges And Surprises
Ever wonder why some pool installations cruise along while others hit unexpected snags? It’s not just luck—it’s experience, planning, and knowing how to troubleshoot the hiccups that almost everyone faces at least once.
- Site Settling: Even a seemingly level base can shift or settle once water is added, causing bulges or tilts. Use a laser level to catch unevenness early.
- Electrical Delays: Sometimes permits for power hook-ups lag behind. Reach out to a licensed electrician early to prevent a frustrating standstill mid-project.
- Weather Delays: Rain soaks parts, wind scatters materials. Keep tarps or pop-up tents handy for temporary protection—especially if you’re installing during spring or fall.
- Poor Drainage: Standing water near your installation site can erode the foundation over time. Consider adding French drains or a gravel bed if needed after a heavy storm.
- Plumbing Leaks: Those little drips add up fast. Double-check gaskets, clamps, and use Teflon tape on every threaded fitting.
⚠️ Important Warning: If you discover electrical or plumbing issues you’re not qualified to handle, hit pause and consult a certified contractor. The Association of Pool & Spa Professionals strongly recommends professional help for these stages to avoid safety and warranty problems.
Problem vs. Solution Table
| Challenge | Potential Impact | Solution |
|---|---|---|
| Base Not Level | Uneven water, structural strain | Re-level before adding water |
| Late Filter Delivery | Can’t run pump, poor circulation | Contact supplier, delay fill |
| Tight Access Path | Equipment can’t reach site | Remove gates/fencing temporarily |
Picture this scenario: You’ve finished assembling every wall, but as you start filling, you spot a slow leak at a hose joint. Instead of undoing hours of work, you unplug and drain just a section—thanks to installing inline ball valves, a tiny upgrade you’d seen recommended in forums and by pool installers. That one small detail saved your whole weekend.
What actually works might surprise you…
Testing, Filling, And Prepping For Your First Swim
Ready for that first swim? Wait—did you know the way you test and fill your Endless Pool right now can make or break both water clarity and comfort for months to come? This is the most tempting part to rush, but it’s also where patience is rewarded.
- Double-Check All Connections: Before a single drop goes in, examine every hose, union, and seal for tightness. Missing this step leads to surprise leaks underground or behind panels.
- Slow Fill: Start the garden hose and watch closely as the water level nears halfway up the side. Pause at intervals to ensure nothing seeps or pools where it shouldn’t.
- Initial Water Testing: With the pool half full, use test strips to check pH, chlorine or bromine, and total alkalinity. Adjust with recommended chemicals from brands like Taylor Technologies or Bioguard as needed. Safe swimming levels are a must before use!
- Run The Pumps & Filtration: Activate the filtration system and swim current at low speed for at least 1 hour before entering. Listen for odd noises—squealing or rattling signals a quick fix may be needed.
- Final Tuning: Set the temperature, verify the swim current is centered, and skim any debris. Now you’re just minutes from that first glide.
💡 Pro Tip: The Centers for Disease Control and Prevention recommends testing residential pool water weekly with a quality kit—not just relying on free chlorine alone, but also keeping pH between 7.2 and 7.8 for comfort and equipment longevity.
Pool Testing & Prep Checklist
- Test kit (pH, chlorine/bromine, alkalinity)
- Pool chemicals (adjust as required)
- Skimmer or leaf net
- Chemical-resistant gloves
- Thermometer for water temp
In practice: a neighbor of mine topped off their Endless Pool after a storm, skipped testing afterward, and ended up with cloudy water and itchy skin for a week. Just thirty minutes with a test kit would have made all the difference. Don’t let excitement override the fundamentals—your comfort, safety, and fun depend on these last, critical checks.
Once this is in place, the rest of the routine falls into place naturally.
Your First Swim Is Finally Close
If you take just one thing from this endless pool installation guide, let it be: planning and patience save more time (and hassle) than any shortcut ever will. Sorting out your space, knowing what’s in the box, and getting every setup step right makes all the difference.
Before, installing a backyard pool might’ve felt overwhelming—uncertainty, hidden costs, and worries about leaks or delays. Now, you know what really matters: smart preparation, double-checking at every stage, and testing before the first splash. You’re not just ready—you’re ahead of where most new owners start.
Which part of your pool setup are you most excited—or nervous—about? Share your questions or stories in the comments below. Your experience could help the next person take the plunge!

Marcus Lee Whitmore is a lap pool enthusiast and aquatic fitness writer dedicated to helping homeowners plan, install, maintain, and train in their home lap pools. With years of hands-on experience managing his own lap pool and endless pool system, Marcus built Ldesw to be the honest, practical resource every lap pool owner deserves from day one.