Picture this: sunlight dances on the water as you step into your own lap pool—hoping today’s swim won’t leave you aching, but actually help you heal. If you’ve struggled with injuries or ongoing pain, the idea of ditching sore joints and regaining strength at home probably feels like a distant dream—one you wish was easier to reach.
Here’s the thing: recovery often feels like endless appointments, strict routines, and lots of frustration when progress moves at snail’s pace. You might wonder if your pool is just an underused luxury, when it could actually be your most powerful tool for rehabilitation—right in your backyard.
By the end of this guide, you’ll know exactly how to put aquatic therapy guide home pool into action—transforming ordinary swim time into focused recovery that fits your life. Ready for the exact exercises and setup details? Let’s dive in.
Understanding Aquatic Therapy And Its Healing Benefits
Why does your body feel lighter the moment you slip into the pool? It’s not just comfort—it’s science. Aquatic therapy harnesses the natural resistance and buoyancy of water to help people rebuild strength, flexibility, and confidence after injuries or medical setbacks.
At its core, aquatic therapy (sometimes called aquatic rehabilitation or hydrotherapy) involves guided movements in water, aiming to reduce stress on joints while supporting muscle recovery. The warmth and pressure of the water can even improve blood flow—helping your body heal faster and easing chronic pain. That’s why the American Physical Therapy Association recognizes aquatic exercise as an effective tool for many rehab programs.
💡 Pro Tip: Warm water between 88°F and 94°F is optimal for most home aquatic therapy. It relaxes muscles and encourages better range of motion—especially if you’re dealing with arthritis or post-surgical stiffness.
So, who benefits most? If you’ve suffered a knee injury, are battling back pain, or need low-impact exercise during recovery, aquatic therapy provides a safe environment to move freely. NASA even uses buoyancy-supported protocols for astronauts’ reconditioning after space missions—talk about out-of-this-world science backing up your backyard routine!
- Buoyancy: Supports body weight, taking strain off painful joints.
- Hydrostatic pressure: Provides gentle compression, reducing swelling and boosting circulation.
- Natural resistance: Every movement works your muscles safely, helping progress without overexertion.
Picture this scenario: Anna, a marathon runner, sprains her ankle and her doctor advises months off the track. Instead of endless frustration, Anna starts basic aquatic therapy at home. Five weeks later—lighter steps, less pain, and she’s ahead of her old routine.
| Key Benefit | Impact On Recovery | Most Effective For |
|---|---|---|
| Buoyancy Support | Less joint pain, easier movement | Arthritis, Joint Replacements |
| Water Resistance | Builds muscle with low injury risk | Sports Injuries, Muscle Weakness |
| Temperature Control | Reduces stiffness and spasms | Neurological Conditions, Post-Op Swelling |
And honestly? You might be surprised how much progress is possible, even if you’ve struggled with traditional land-based therapy. But there’s one detail most owners completely overlook until it’s too late…
Preparing Your Home Lap Pool For Safe Therapy Sessions
Before you get started with aquatic therapy in your home lap pool, it’s crucial to make the space as safe and supportive as possible. Ever wondered what actually needs to be done—not just for comfort, but real safety and effective rehab? The truth is, skipping key prep steps can turn a promising recovery routine into a risky experience.
- Test and adjust water temperature: Aim for 88°F to 94°F. This range relaxes muscles while keeping you alert—according to the Aquatic Exercise Association, it’s considered ideal for most aquatic therapy participants.
- Check water depth and clarity: Ensure the water is at least waist-deep for standing exercises. Crystal clarity helps you see where you step, reducing accident risks.
- Install or double-check safety handrails: Non-slip, corrosion-resistant rails make entering and exiting safer, especially if balance is an issue.
- Clear pool edges and surfaces: Remove toys, floats, or misplaced objects from the water and pool deck. Trip hazards are an avoidable source of mishaps and stress.
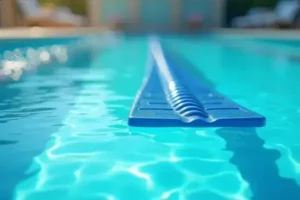
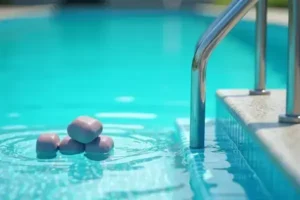
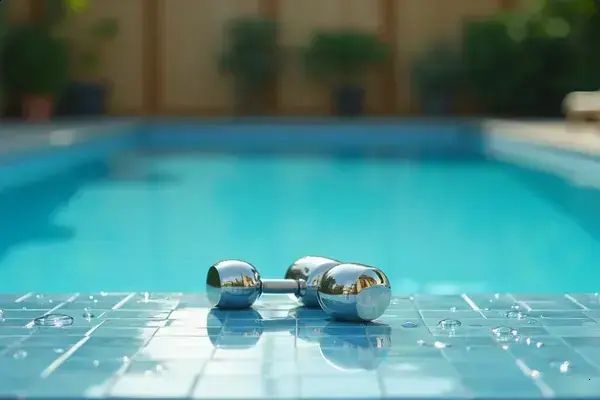
- Prepare your equipment: Set out aquatic dumbbells, ankle weights, or resistance gloves within easy reach. If you’re new to aquatic tools, start simple and increase complexity as you gain confidence.
- Pool thermometer
- Non-slip handrails (stainless steel preferred)
- Water test kit for pH/chlorine/bromine
- Towel and non-slip sandals
- Aquatic therapy equipment
⚠️ Important Warning: Always supervise therapy sessions if you have mobility concerns, dizziness, or a neurological condition. The Centers for Disease Control and Prevention recommend never swimming alone—better safe than sorry.
In practice: imagine Chris, recovering from a rotator cuff injury, prepping his backyard pool before his first home therapy session. He checks the steps, wipes down the pool ladder for grip, and staggers his aquatic weights—one on the side, one floating nearby. No rushed starts, no overlooked puddle on the deck. The whole process takes twelve minutes, but Chris feels ready and calm.
| Step | Estimated Time | Safety Benefit |
|---|---|---|
| Set Water Temperature | 3 min | Comfort, muscle safety |
| Install Handrails | 4 min | Minimizes slip risk |
| Clear Pool Deck | 2 min | Removes trip hazards |
| Layout Equipment | 3 min | Prevents overreaching |
What actually works might surprise you…
Step-By-Step Aquatic Exercises For Rehabilitation
Wondering where to start when it comes to effective aquatic exercises for rehab? You’re not alone—and honestly, knowing what to do (and what to skip) changes everything about your results. The American Physical Therapy Association notes that even simple pool routines can dramatically speed up healing for joint, muscle, and post-surgery recovery when done right.
- Warm-Up Water Walking – Stand in waist-deep water, shoulders relaxed. Walk slowly from one end of the pool to the other. Focus on gentle heel-to-toe movement for 3-5 minutes. This increases circulation and primes your muscles.
- Leg Lifts at Pool Edge – Holding the side for balance, lift one leg out to the side, then back down. Perform 10 reps per side. Builds hip strength without pounding joints.
- Wall Push-Offs – Facing the pool wall, place hands shoulder-width apart and gently push off, floating backward. Repeat 10 times. Improves upper body strength and core stability.
- Resistance Walking (with Aquatic Dumbbells) – Walk forward and backward, holding waterproof dumbbells under the surface. Add variety by alternating slow and quick paces. Time: 5 minutes per circuit.
- Cool Down: Gentle Flutter Kicks – Hold onto the pool edge, stretch out behind you, and do slow, controlled kicks for 2-3 minutes.
- Aquatic dumbbells or resistance gloves
- Non-slip sandals for poolside use
- Pool thermometer (to verify temp stays comfortable)
- Towel and water bottle nearby
💡 Pro Tip: Perform each exercise at your own speed—quality over quantity. Mayo Clinic recommends starting with short sessions (15-20 minutes) and building up as comfort and strength improve.
In practice: picture this scenario—Sam recently had a knee arthroscopy. Land workouts were a nightmare, with swelling and pain after ten minutes. But once he swapped in aquatic routines, progress soared: less pain, better motion, and every session left him feeling stronger, not exhausted. The American Council on Exercise points out this is common—the support and gentle resistance of water make these moves incredibly joint-friendly.
| Exercise | Target Area | Best For |
|---|---|---|
| Water Walking | Whole Body | General Rehab, Beginners |
| Leg Lifts | Hips & Thighs | Hip/Knee Injury |
| Wall Push-Offs | Arms & Core | Shoulder Rehab |
| Flutter Kicks | Legs/Core | After Lower Limb Surgery |
And this is exactly where most people make the most common mistake…
Adapting Aquatic Therapy To Common Injuries And Conditions
How do you tweak aquatic exercises to match your unique body—especially when injury or chronic pain is part of the equation? That’s where customization turns ordinary pool time into real therapy. The Arthritis Foundation points out that personalizing aquatic routines dramatically increases comfort and the chances of long-term recovery.
Not all injuries—or goals—are created equal. Someone dealing with osteoarthritis may need gentle, continuous movement. Recovering from an ACL repair? You’ll add more resistance with ankle weights as you gain strength. Post-stroke? The focus shifts to balance and controlled, bilateral exercises. The secret? Listening closely to what your body can (and can’t) do on any given day.
💡 Pro Tip: When in doubt, use the lowest-resistance option first. Gradually add pool gear like therapy noodles, aquatic gloves, or ankle cuffs only when movement no longer aggravates your symptoms. It’s always quality over quantity, especially early in rehab.
In practice: picture this scenario—Lisa, recently diagnosed with rheumatoid arthritis, uses her lap pool when mornings are tough. On high-pain days, she floats with a pool noodle, focusing on relaxed shoulder rotations. By week three, she introduces gentle resistance for arms and short flutter kicks. Her customized approach keeps her motivated and seeing results without triggering flare-ups.
| Condition | Best Adaptation | Recommended Equipment |
|---|---|---|
| Arthritis (OA/RA) | Smooth, low-impact range-of-motion | Pool noodles, therapy gloves |
| Post-Surgical Rehab | Gradual resistance, guided sessions | Ankle weights, resistance bands |
| Chronic Back Pain | Core stabilization, gentle kicking | Kickboards, floatation belts |
| Stroke Recovery | Balance drills, bilateral movements | Stability bars, pool steps |
- Symptom tracking journal
- Water shoes with extra grip
- Adjustable pool resistance tools
Remember, always consult your physician or licensed physical therapist before changing or beginning any new rehab or therapy routine, especially with a complex medical history.
But there’s one detail most owners completely overlook until it’s too late…
Tracking Progress And Enhancing Your Pool-Based Recovery
How do you know your pool-based recovery is actually working? The truth is, the best gains in aquatic therapy come when you track your progress—small milestones add up to big changes. Without a plan, it’s easy to get discouraged or plateau too soon.
Here’s the thing: effective tracking isn’t just about checking off workouts. It’s about noticing patterns—what hurts, what improves, and when you can safely increase intensity. According to the National Institutes of Health, regular self-monitoring strengthens mind-body connection and helps physical therapists adjust your exercises for better, faster results.
💡 Pro Tip: Use a physical therapy log or smartphone journal to track pain levels, flexibility, and strength after each pool session. Mark specific days when you increase resistance or try a new movement. Over time, subtle improvements become clearly visible.
- Date and duration of each therapy session
- Exercises performed (including equipment used)
- Pain, fatigue, or swelling before and after
- Mobility or activity notes (example: able to walk farther, stand longer, less soreness)
Sample Tracking Table
| Date | Exercise/Equipment | Progress/Notes |
|---|---|---|
| July 6 | Water walking, dumbbells | Mild hip soreness, improved range |
| July 12 | Wall push-offs, ankle weights | Less fatigue, increased reps |
| July 18 | Leg lifts, flutter kicks | No swelling, standing easier |
In practice: picture this scenario—Michael, recovering from spinal surgery, fills out his pool log every session. At first, it’s only a few laps and basic leg lifts, but over weeks, he sees clear milestones (longer sessions, better balance, fewer bad pain days). The progress he charts keeps him motivated and shows his therapist when to safely level up.
Small steps, repeated consistently, make the biggest difference over time.
Your Pool Can Change Everything
We covered a lot, but here’s what matters most: safe prep sets the stage, tailored aquatic exercises accelerate healing, and tracking progress keeps you motivated. If you take just one thing from this aquatic therapy guide home pool, let it be: thoughtful consistency in your own pool powers real, lasting recovery.
Maybe before now, your pool was just for hot days or quick swims. But now? It’s your personal rehab center. You know how to adapt for your body, start the right routines, and notice every bit of progress. Small changes lead to big wins when you stay patient and show up. You really can do this.
Which pool-based exercise or tip are you most excited to try for your rehab or recovery? Share your plan—or your biggest question—in the comments below!

Marcus Lee Whitmore is a lap pool enthusiast and aquatic fitness writer dedicated to helping homeowners plan, install, maintain, and train in their home lap pools. With years of hands-on experience managing his own lap pool and endless pool system, Marcus built Ldesw to be the honest, practical resource every lap pool owner deserves from day one.